Share This Article
If you’re planning a trip to the Azores and love a good adventure, climbing Mount Pico should be at the very top of your list.
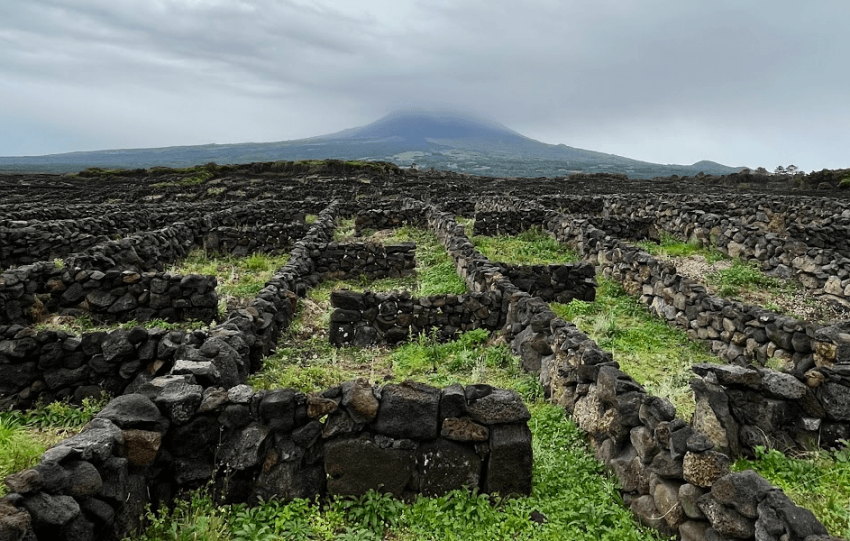
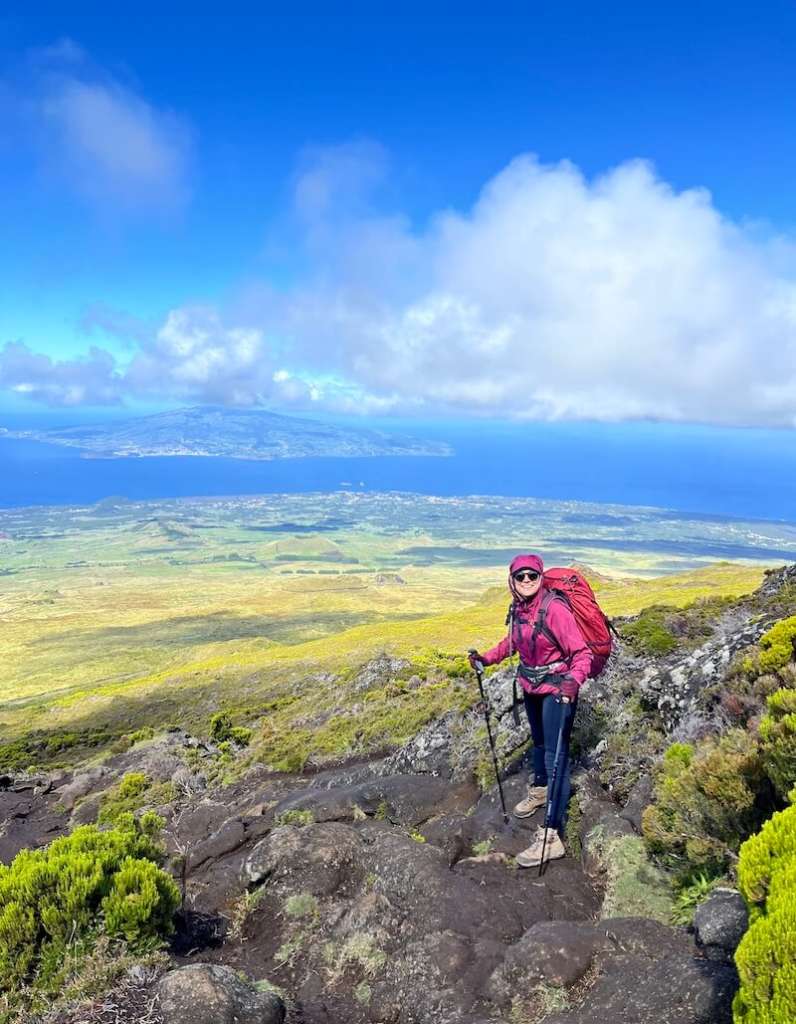
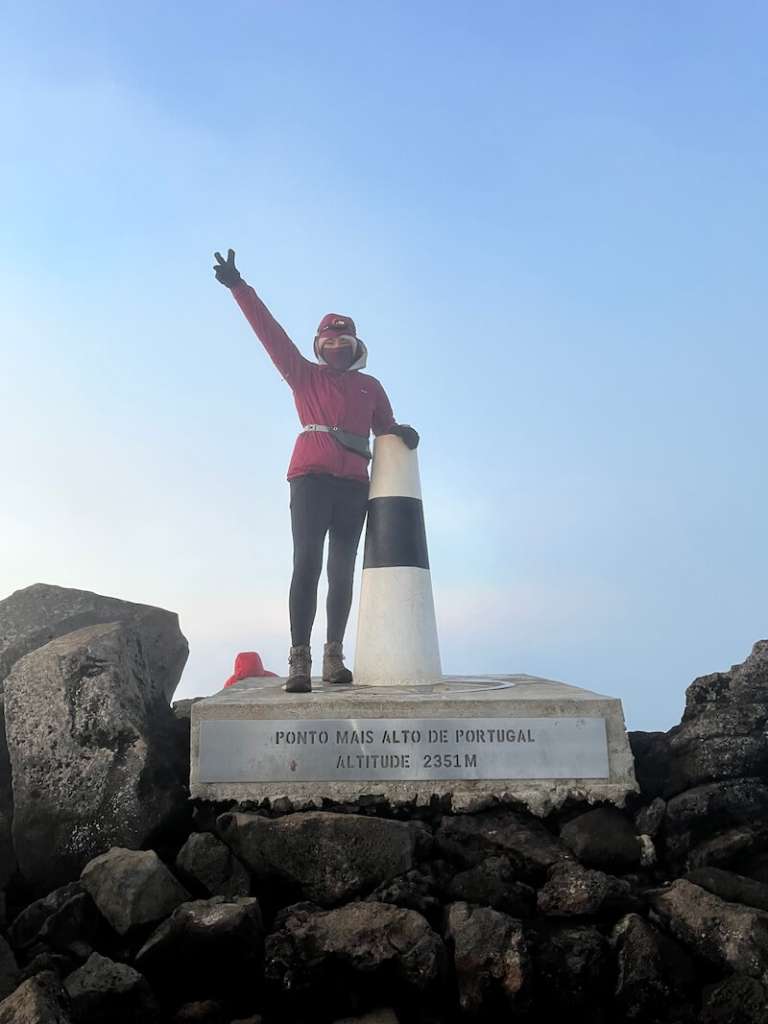
At 2,351 meters (7,713 feet), this dormant volcano isn’t just the highest peak in Portugal — it’s one of the most rewarding climbs in the Atlantic. Standing on its summit, above the clouds, with a 360° view over the surrounding islands, is a moment most travelers never forget.
The Mount Pico hike combines challenge, volcanic landscapes, and unbeatable views, making it the ultimate outdoor experience in the Azores.

This guide will walk you through everything you need to know about climbing Mount Pico: how to get there, what to expect on the trail, the gear you’ll need, and the mistakes to avoid. It’s a practical, detailed resource written by someone who knows the Azores inside out.
If you prefer to climb with an expert guide who handles all the logistics for you, check out this highly rated tour — it’s the official guided Mount Pico climb and includes everything you need for a safe and unforgettable ascent:
👉 Climb Mount Pico – Portugal’s highest peak at 2,351 m (GetYourGuide)
Getting to Mount Pico: Flights, Ferries, and Access to the Trailhead
How to get to Pico Island

Before climbing Mount Pico, you’ll first need to get to Pico Island. The island belongs to the central group of the Azores and can be reached by plane or ferry.
If you’re flying from mainland Portugal or abroad, the easiest route is to arrive in São Miguel (Ponta Delgada) or Terceira first. From there, you can take a short flight to Pico airport. I explain all the possible routes in detail in my article how to get to Pico Island.
If you’re already exploring nearby islands, ferries are a scenic and practical alternative. The connections between Faial, Pico, and São Jorge — known as the Triangle Islands — run year-round, with more frequent schedules in summer. You’ll find updated information in my guide about how to travel between the Azores islands.
How to get to the starting point of the Mount Pico trail
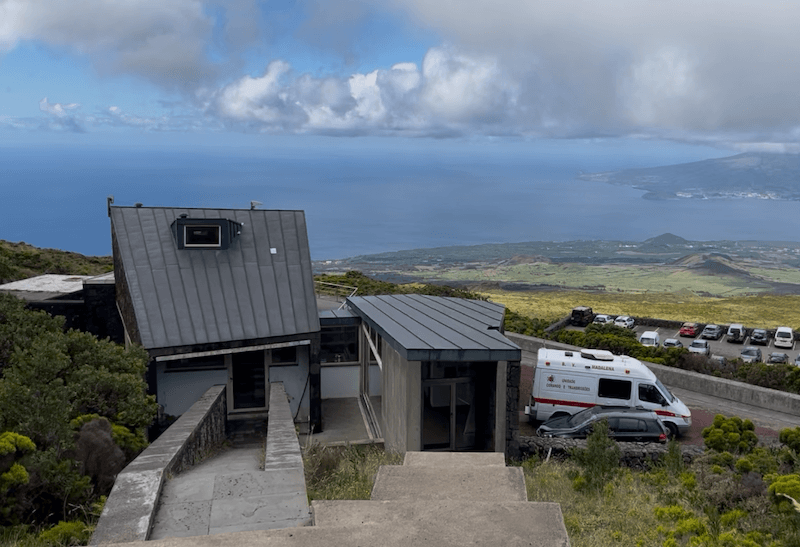
The Mount Pico hike starts at Casa da Montanha, located at around 1,200 meters (3937 ft) of altitude. From Madalena, the drive takes about 25 minutes; from Lajes do Pico, about 45 minutes. There’s a small, free parking area near the base, and taxis can drop you directly at the entrance if you don’t have a rental car in the Azores.
If you’d rather not worry about transportation or logistics, joining a guided Mount Pico climb is a great option. The guides take care of everything, from registration to transport (to and from your accommodation) and even gear rental.
👉 Book your guided Mount Pico climb here
How to get to the starting point of the Mount Pico trail
Registration at Casa da Montanha
Every climber must register at Casa da Montanha, which is the official control point for climbing Mount Pico. This is where you check in before starting and check out after returning from the summit.
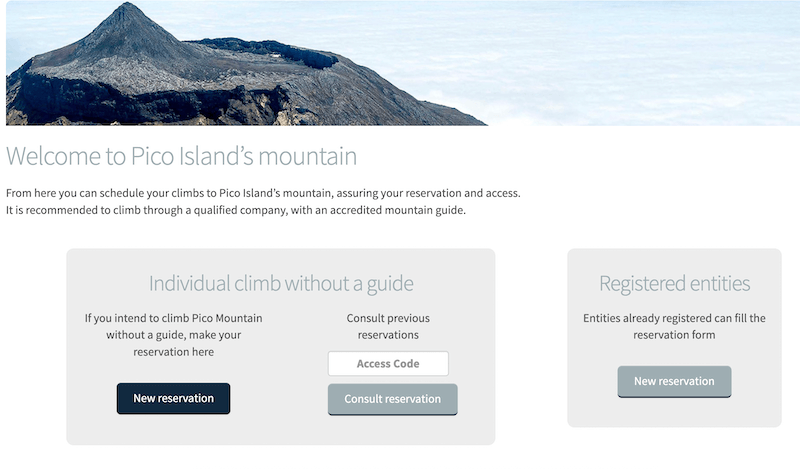
If you are climbing on your own, you need to register online in advance. During summer, the daily quotas often sell out (only 160 people are allowed in the mountain at the same time), so it’s wise to book several days ahead.
If you are climbing with a guide, they will handle the entire registration process for you — you just need to show up.
When you register, you’ll receive a GPS tracker that records your location along the trail. It also allows you to request help in case of an emergency, even if you’re climbing without a guide. You must return the tracker once you finish your climb.
The registration fee is 25€ / person – if you are climbing without a guide. If you book a Guided hike to Mount Pico, the price of the experience already includes the registration fee at Casa da Montanha – more about that on the following sections!
How to get to the starting point of the Mount Pico trail
Opening hours of Casa da Montanha
Casa da Montanha is open year-round, but its schedule changes with the season:
- From May 1st to September 30th: open 24 hours.
- From April 1st to 30th and October 1st to 31st: open continuously from 8am to 8pm.
- From November 1st to March 31st: open daily from 8am to 6pm.
- Closed on January 1st and December 25th.
If you plan to climb outside the summer months, check the schedule before going — hours can occasionally change due to weather or maintenance work.
Climbing Mount Pico: Best Time and Weather Considerations
Best time of the year to climb Mount Pico
The best time of the year to climb Mount Pico is during July and August. These are the only months when the weather is consistently stable enough. Before and after that period the mountain often experiences rain, fog, and strong winds that can make the ascent more difficult and even unsafe. But I do think that the shoulder months – May, June, September, and October – are quite interesting to hike Mount Pico because it is not as hot during the day (I HATE climbing on warm days!).
If you are climbing in July or August, you’ll benefit from longer daylight hours, clearer skies, and warmer temperatures at the base. However, because this is the busiest time of year, it’s important to book your climb in advance.
Weather considerations
No matter the time of year, Mount Pico is a high mountain with its own microclimate. Weather conditions can change rapidly, and it is common to experience sunshine, fog, rain, and wind all in the same climb. It’s quite an emotional rollercoaster :D
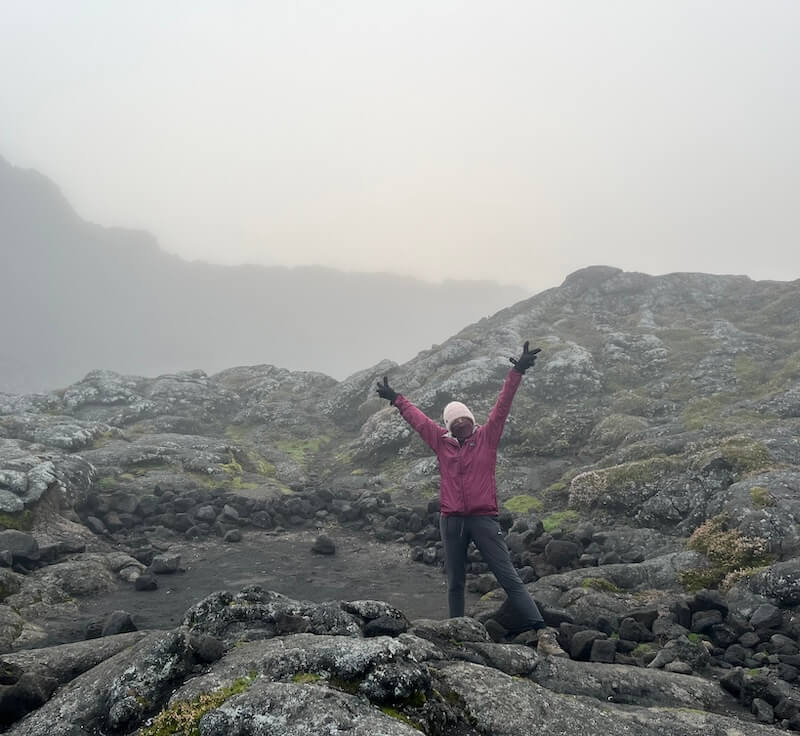
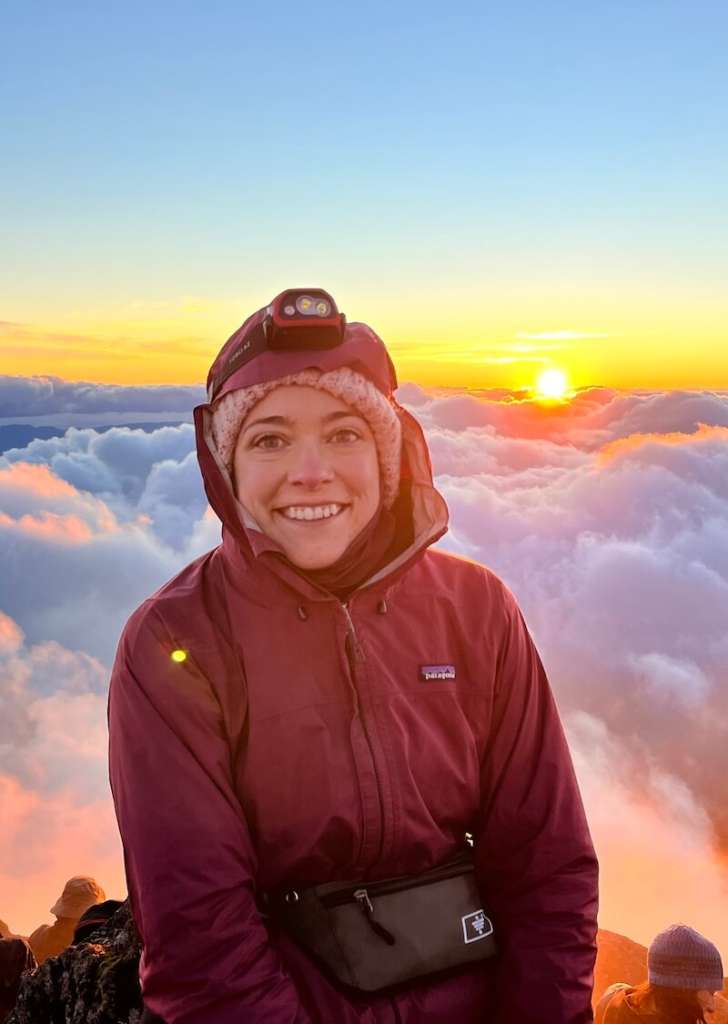
It is always cold and windy at the top. Even in summer, temperatures at the summit can drop to around 5°C (41°F), and the wind can make it feel much colder. When I climbed in September, it was exactly that: 5°C at the top — while it was a warm 20°C (68°F) at the base.
Because of these conditions, you should always bring layers of warm clothing, even if the day starts sunny. I’ll cover all about the gear you need to climb Mount Pico on the next sections, don’t worry :)
Before climbing Mount Pico, always, ALWAYS check the live webcams and weather forecast. Otherwise you’ll go through a world of pain just to arrive at the top and see nothing at all! If it is not looking promising, it’s better to wait a few hours or reschedule than to risk climbing in unsafe conditions.
Fitness and Difficulty of Climbing Mount Pico
Climbing Mount Pico is a serious physical challenge. I go to the gym three times a week and hike almost every weekend, and I still found it hard. So if you’re wondering whether it’s difficult — yes, it is.
The trail is short in distance, just 3.8 kilometers (2.36 miles) each way, but that number doesn’t tell the full story. You’ll be gaining more than 1,100 meters (3.600 ft) of elevation in a very short distance, which means you’re climbing steeply the entire time.
The good news is that going up is totally manageable. Even the final section to Piquinho — the small cone inside the crater — looks scarier than it really is. You do have to use your hands to scramble, but it’s short and straightforward.
The real challenge comes on the way down. The terrain is steep and made of loose volcanic rock, which means your feet slide constantly. There are moments when you look at the trail and wonder where on earth to stick your hiking poles. You have to pay attention every second and, even so, almost everyone slips or falls at least once. It’s normal. When I climbed, several people in my group fell a few times — myself included.
Trekking poles help a lot, but they don’t eliminate the strain. By the time you get back to Casa da Montanha, every joint in your body will feel it: ankles, knees, hips. Places in your body you didn’t even know that existed will scream for help and you’ll wonder why the hell did you sign up for this 😂
Climbing Mount Pico is difficult, but it is totally doable if you train or hike regularly, take it slow, and respect the mountain; and reaching the summit is one of the most rewarding experiences you’ll ever have in the Azores.
Climbing Mount Pico: with or without a Guide?
You can climb Mount Pico on your own or with a guide, and both options are perfectly valid — it depends on your experience, confidence, and what kind of adventure you’re looking for.
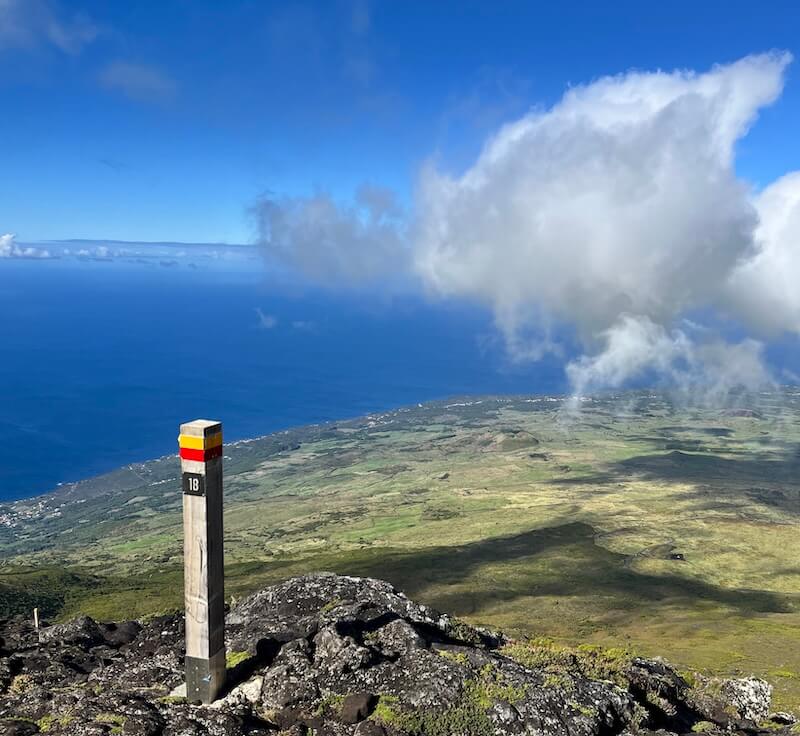
Climbing independently is totally doable because the trail is well marked, with 47 wooden poles from Casa da Montanha all the way to the crater. You won’t get lost as long as visibility is good and you keep an eye on the markers. It’s also the cheaper option: you only need to pay the 25€ registration fee at Casa da Montanha.
That said, I strongly recommend going with a guide — and I say this after climbing it myself :) The guides on Pico are incredibly experienced, as they know this mountain like the back of their hands. They don’t just lead the way; they actively coach you through the entire climb, telling you where to place your feet and hiking poles to avoid slipping or wasting energy. It makes a huge difference, especially on the descent.
There are also serious safety reasons to consider. Every. single. week there are accidents on the mountain — twisted ankles, falls, people getting lost in fog or underestimating the conditions. When you go with a guide, you don’t have to worry about any of that. They constantly monitor the weather, manage your pace, and know exactly what to do in case something goes wrong.
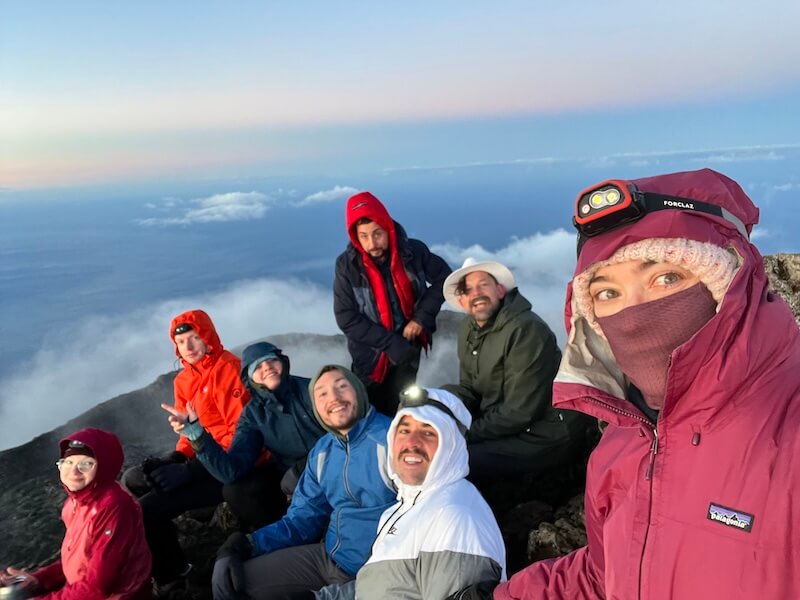
And beyond safety, there’s another big reason I personally loved climbing with a guide: the people. You meet like-minded travelers from all over the world who share the same sense of challenge and excitement. By the time you reach the summit together, it feels like a small, temporary family — one that only those who’ve climbed Mount Pico can truly understand.
If you’d rather have that peace of mind and climb with someone who will make the experience safer and smoother, this is the guided Mount Pico hike I recommend. It’s operated by licensed local experts who take care of everything for you — transport, registration, and guidance from start to finish.
👉 Book your guided Mount Pico climb
Climbing Options and Experiences
Depending on how adventurous (or sleepless) you want your experience to be, there are three ways to do the Mount Pico hike: the regular day climb, the night climb to see the sunrise, and the overnight experience sleeping in the crater.
Day climb

This is the classic way to climb Mount Pico — up and down on the same day. Most people start between 7am and 9am, and the full round trip takes about seven to eight hours, including breaks and photo stops.
The day climb is the most practical option if you’re short on time or just want to focus on the physical challenge. You don’t have to worry about camping gear or freezing temperatures at night — just bring good boots, warm layers, food, and plenty of water.
Given the timings, you won’t be able to enjoy neither the sunrise nor the sunset at the top of the mountain, and that’s a bummer. But, on the other hand, it is the easiest, most comfortable way of enjoying Mount Pico.
👉 Book your Mount Pico day climb
How to get to the starting point of the Mount Pico trail
Night climb (sunrise at the summit)
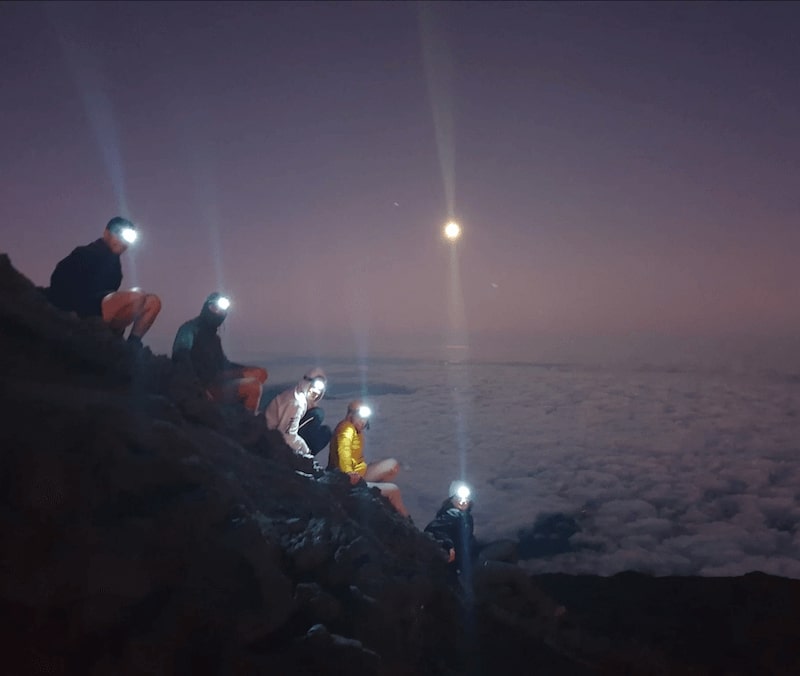
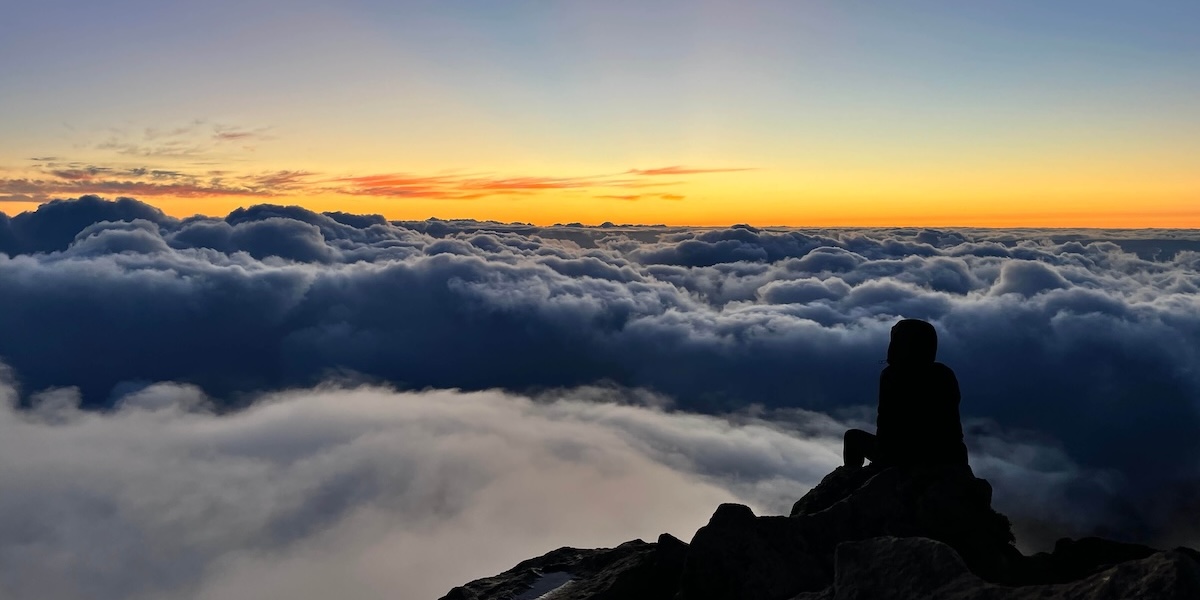
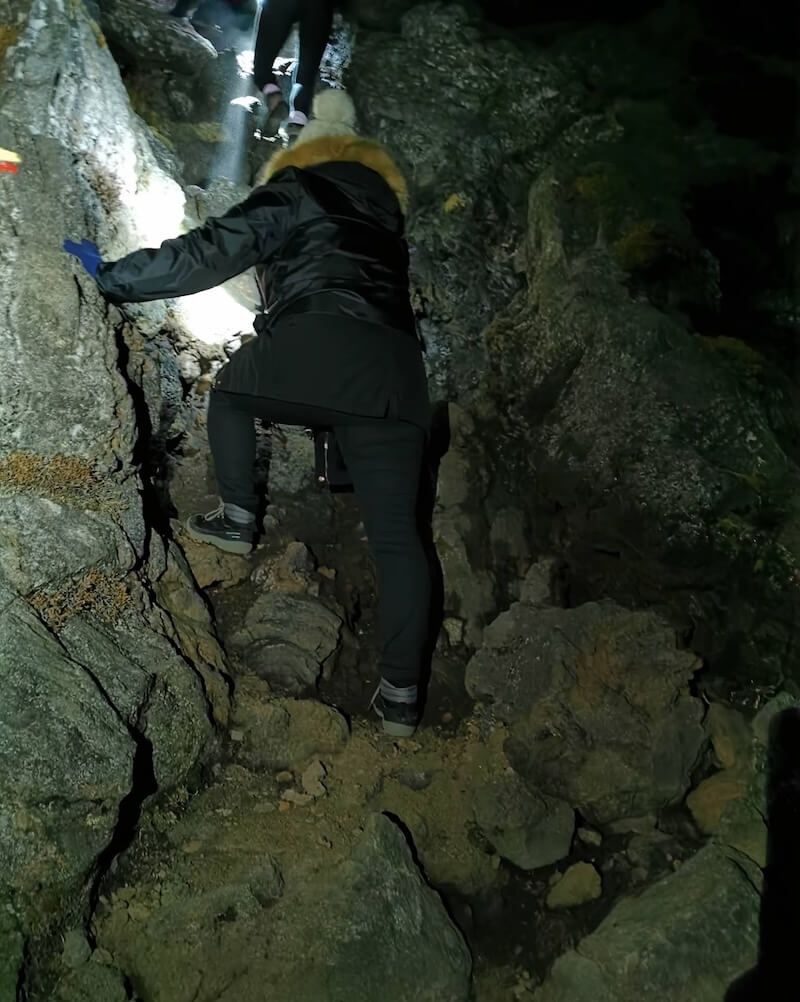
Climbing Mount Pico at night is a different kind of magic. You start around midnight, guided by your headlamp and the sound of your own footsteps, and reach the summit just as the sun rises over the Atlantic. Seeing the islands of Faial and São Jorge emerge from the clouds while the sky turns pink is one of those moments that stays with you forever. And, after watching the sunrise, you will go down the mountain at once.
This version requires more discipline and concentration — you’ll be hiking in the dark on loose volcanic rock — and, let’s face it, it can be more dangerous to hike in the night in an unfamiliar mountain.
But it’s completely worth it. It’s also much less hot, and you get to enjoy the trail without the summer crowds.
How to get to the starting point of the Mount Pico trail
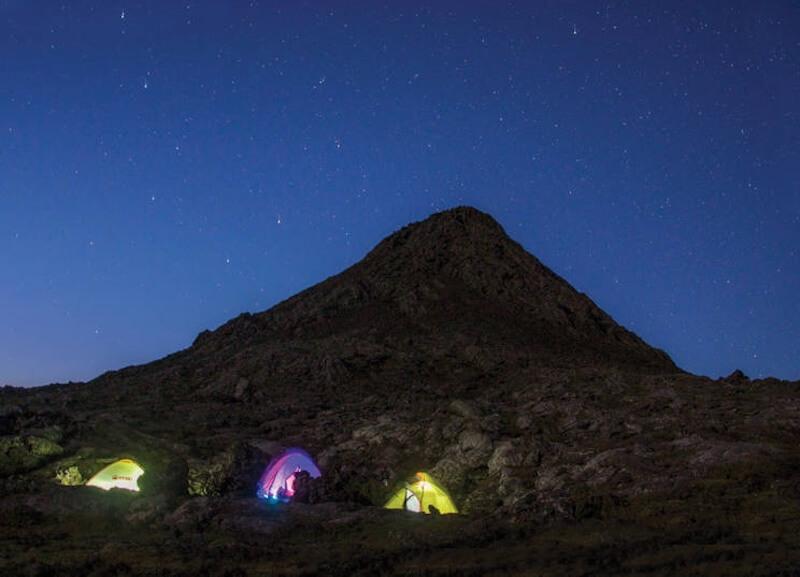
Overnight climb (sunset, camping, and sunrise)
I’ve done this one, so trust me when I say it looks way better on paper than it actually is. The idea is incredible: you climb during the day, catch the sunset from the top of Portugal’s highest mountain, camp in the crater overnight, and wake up to a golden sunrise before hiking down. Sounds amazing, right?
Well, here’s the reality.
First, you won’t sleep well — or at all. It’s freezing and windy at the top. When I did it in September, it was around 5°C (41°F), and it was raining as well, so in between the cold, the rain and the snores coming from nearby tents I didn’t sleep for a minute. It was hell on earth!
Second, the top of the mountain is full of mosquitoes — and I mean big ones. Every time you open your tent, a small army gets inside. It’s honestly disgusting.
Third, you’ll need to carry a lot more weight: double the food and water, plus a tent, sleeping bag, and mattress. The climb is already challenging enough without all that extra gear.
And finally, it’s expensive. Overnight guided climbs cost around 200€ per person, which, in my honest opinion, is not worth the discomfort. So if I had to do it all over again, I would not choose this option.
What is the right option for you?
If you want my honest advice: skip the overnight climb. Do either the day climb or the night climb instead — and go with a guide. You’ll still have the support, safety, and company of someone who knows the mountain perfectly, but without the extra weight, bugs, or frostbite.
The day climb is ideal if you want a full, active day in nature and prefer to sleep in a real bed afterward. The night climb is perfect if you’re chasing that unforgettable sunrise moment and don’t mind hiking in the dark.
Either way, you’ll have an amazing experience and still be able to walk properly the next day — which is always a bonus.
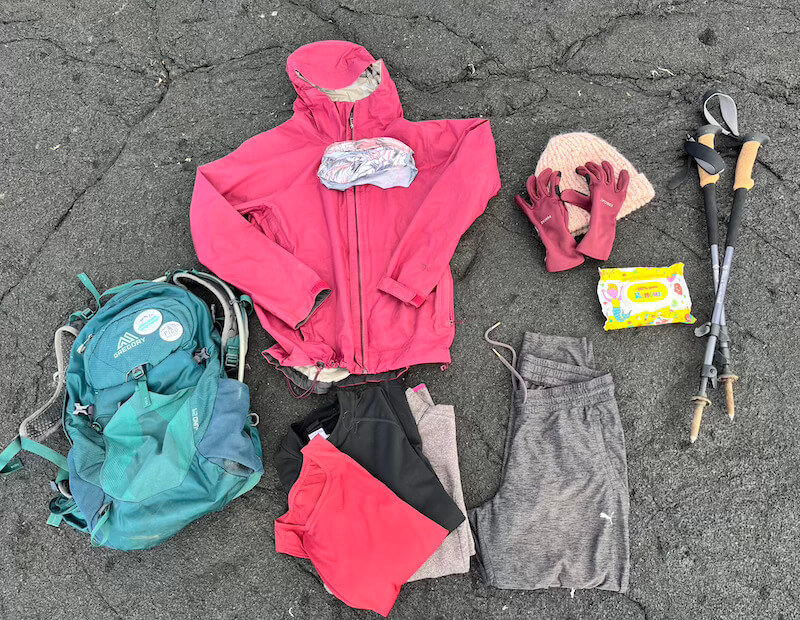
Essential Gear and Packing Checklist
Here’s a short and realistic list of what you actually need for the Mount Pico hike. No fluff, no “just in case” items — only what makes a real difference on the mountain.
Hiking boots
- Budget option: NORTIV 8 Waterproof Hiking Boots – affordable, sturdy, and surprisingly durable for the price.
- High-quality option: Columbia Men’s Newton Ridge Plus II Waterproof Hiking Boot
– excellent traction and ankle support for steep volcanic terrain. There is a women’s version of the same boot as well.
Hiking poles
- Budget option: Cascade Mountain Tech Trekking Poles – lightweight aluminum, perfect for casual hikers.
- High-quality option: BLACK DIAMOND Trail Cork Trekking Poles – these are actually the ones I use and I swear by them – I particularly love the cork handle!
Layers and clothing
- Base + mid + layer: personally I love my long-sleeved shirts from Van Rysel and yes, I use the male version and all.
- Raincoat jacket: for men I recommend the Diamond Candy Men’s Hooded Waterproof Jacket, for women I like the Diamond Candy Women’s Waterproof Rain Jacket with Hood.
- Neck buff: I never, EVER hike without neckwear this is one of those things that I DO CARE about the brand because I think that Buff’s neckwear really stand from the crowd. I like them with colorful patterns but this color neutral Buff Lightweight Merino Wool Neck Gaiter is a great option as well.
- Warm gloves: the FanVince Winter Gloves Touch Screen are so cheap and honestly so good!
- Beanie: DANISH ENDURANCE Merino Wool Beanie for Men & Women.
Headlamp
- The LHKNL Rechargeable Headlight is super affordable and it will do the trick.
Hydration system
- I use the Water Buffalo Oasis Hydration Bladder. It is not the cheapest option but I personally like the locking system (there are many who use screw-on lids and I don’t like them). If you want something cheaper, go for the KUREIDA Hydration Bladder.
Hiking backpack
- Getting a backpack is a very personal decision, but I personally love the Osprey Talon 33 Men’s hiking backpack and the Tempest 30 Women’s Daypack. Yes they are expensive but if you’re a seasoned hiker like me, your backpack will be like your second home and it will last for 10 years.
Power bank
Because your phone will be your camera, GPS, and emergency contact all at once, bring a reliable power source.
I’ve tried soooo many powerbanks over the years and I LOVE the UGREEN Power Bank 25,000mAh. I can charge my iphone 4 times with this powerbank before recharging it, how cool is that?! :)
If you’re climbing with a guide, they’ll usually provide trekking poles, extra headlamps, etc but it’s still worth bringing your own essentials, at least this is what I did (with the exception of the gear we used to stay overnight at the mountain).
What food to bring
For food, keep it simple and high in energy and protein. The climb burns more calories than you expect, and there’s nowhere to buy anything on the trail. I usually bring sandwiches, boiled eggs, a mix of dried fruits and dark chocolate — they’re light, easy to pack, and won’t spoil. Avoid heavy or greasy food that’s hard to digest while hiking.
Route Step-by-Step Breakdown
The Mount Pico trail starts at Casa da Montanha and ends at Piquinho, the small volcanic cone inside the crater. The trail is short in distance — 3.8 kilometers each way — but steep, rocky, and physically demanding. It’s marked with 47 numbered wooden poles from bottom to top, which makes navigation simple even in low visibility (though you should never climb in thick fog).
Here’s what to expect at each stage of the climb.
How to get to the starting point of the Mount Pico trail
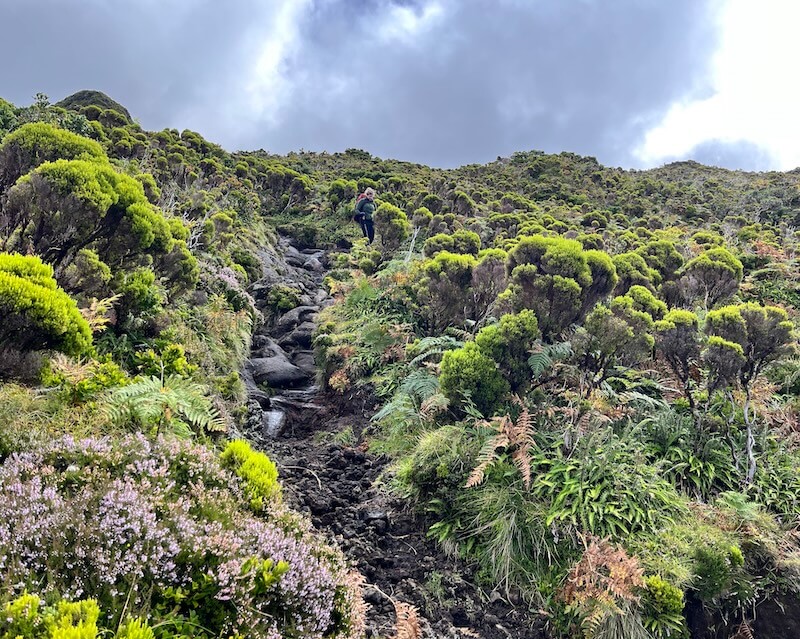
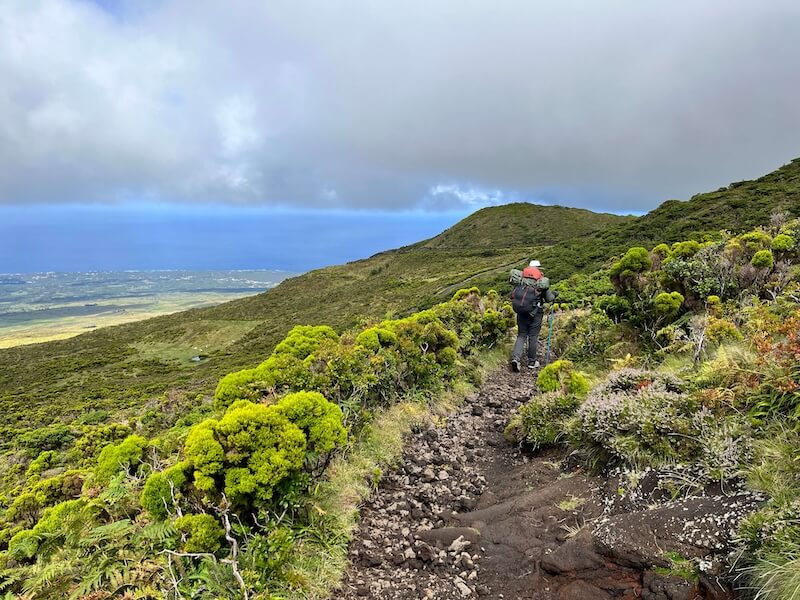
From Casa da Montanha to Marker 10 (Lower section)
- Terrain: compact dirt and small volcanic rocks, some vegetation.
- Difficulty: moderate.
- Duration: about 1 hour.
- Notes: warm up your pace here. The slope is steady but not yet steep.
Marker 10 to Marker 25 (Mid-section)
- Terrain: larger rocks, lava formations, and loose gravel.
- Difficulty: moderate to hard.
- Duration: about 1.5 to 2 hours.
- Notes: the view starts opening up, but the path becomes uneven. Watch your footing — this section already demands good balance and strong legs.
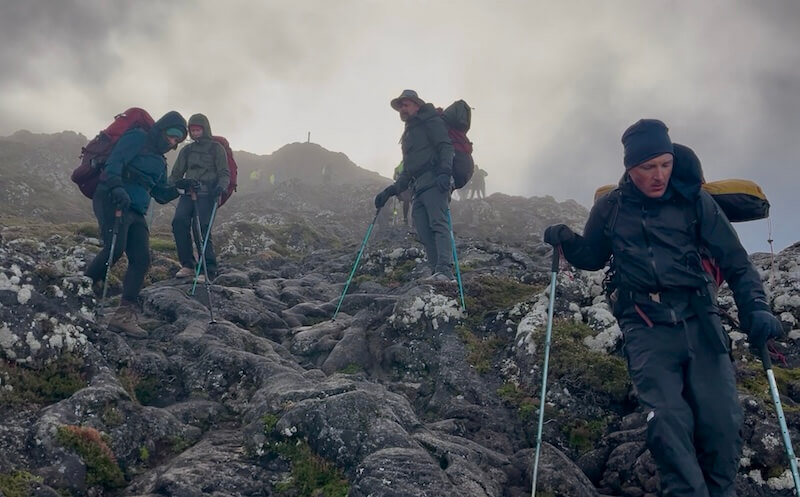
Marker 25 to Marker 45 (Upper section)
- Terrain: loose rock and steep volcanic scree.
- Difficulty: hard.
- Duration: about 2 hours.
- Notes: the trail becomes exposed, and the weather can change fast. Wind and fog are common. Poles are useful, but take care where you place them — the rock is unstable in many areas.
Marker 45 to Marker 47 (Crater and Piquinho)
- Terrain: rough lava rock, steep incline.
- Difficulty: very hard.
- Duration: 30 to 45 minutes.
- Notes: you’ll reach the crater rim first. From there, you can drop your backpack and climb Piquinho — the final 70 meters — using your hands for balance. It’s a short scramble, not technical, but very steep.
Descent
- Terrain: slippery, loose gravel.
- Difficulty: hard.
- Duration: 3 to 4 hours.
- Notes: this is where most people struggle. The steep slope and unstable footing make it tough on knees and ankles. Take it slow, use trekking poles, and stop often to rest.
Average times for the full hike:
- Ascent: 3 to 4 hours
- Descent: 4 hours
- Total duration: 7 to 8 hours
How to get to the starting point of the Mount Pico trail
Safety and Hazards at the Mount Pico
Mount Pico is a relatively short hike, but it’s still a serious mountain. Every year, dozens of rescues take place because people underestimate the conditions or overestimate their fitness. The climb is safe if you prepare well and respect the mountain.
Weather risks
The biggest hazard is the weather. It can change from clear skies to heavy fog or rain within minutes. Visibility can drop so fast that you lose sight of the next trail marker. If you pass one and don’t see the next within 20 minutes, turn back immediately.
At the summit, it’s usually at least 10 degrees colder than at sea level, and strong winds are common. Always carry warm, waterproof layers even if the weather looks perfect when you start.
Terrain hazards
The terrain is steep and uneven, made of sharp volcanic rock and loose gravel. Slips and falls are common, especially on the descent. Wear solid hiking boots and use trekking poles for stability. Avoid rushing — most injuries happen when people are tired and trying to go down too fast.
Fatigue and dehydration
Climbing Mount Pico takes seven to eight hours, and there’s no shade or water along the trail. Bring at least two to three liters of water and enough food to last the entire day. Take short breaks often, especially before the descent.
Emergencies
All climbers receive a GPS tracker when registering at Casa da Montanha. This device allows the authorities to locate you and send help if needed. If you’re climbing alone, never turn it off or leave it behind.
If you’re with a guide, they’ll handle communication and emergency procedures, but it’s still important to know how to act if conditions worsen: stop, find shelter behind rocks, and wait for the weather to improve.
Wi-Fi and phone connection
While Pico Island has reliable 4G and Wi-Fi coverage in most areas, you’ll lose signal as you climb higher. There’s no mobile or data connection near the summit, so don’t rely on your phone for maps or communication. Keep your GPS tracker on at all times, and download offline maps before the hike.
How to get to the starting point of the Mount Pico trail
After the Summit
Reaching the top of Mount Pico is one of the most rewarding things you can do in the Azores — but by the time you return to Casa da Montanha, you’ll probably be sore, hungry, and ready for a massage. Luckily, Pico Island has plenty of ways to recover, relax, and keep exploring.
How to recover after climbing Mount Pico
If you ask any mountain guide in the island they will tell you that the best thing to do after climbing Mount Pico is to soaking in one of the island’s natural swimming pools. This really helps with sore muscles and your overall sanity :P
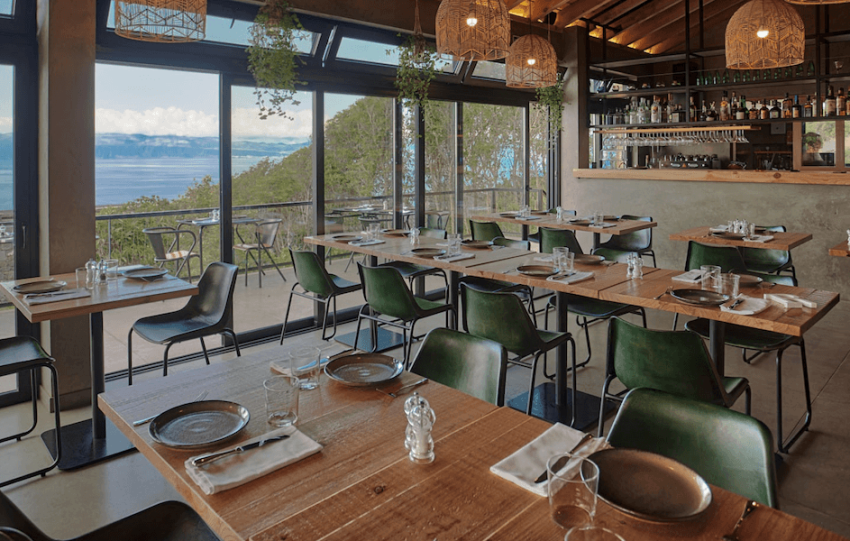
Then go for a good meal — you’ve earned it. Head to Madalena or Lajes do Pico and look for local restaurants serving grilled fish or octopus, Pico cheese. Your body will thank you for the extra protein.
If you’re staying longer on the island, give yourself at least one rest day before doing another hike or activity.
What to do next on Pico Island

Pico has a lot more to offer than just the climb. Here are some experiences worth adding to your itinerary:
- Whale watching from Lajes do Pico – Pico is one of the best places in the world for whale and dolphin sightings, with tours departing daily from Lajes.
👉 Book your whale-watching experience here - Guided island tour – If you want to explore the rest of Pico without driving, this full-day tour takes you around the island’s best viewpoints, lava formations, and villages.
👉 Book your Pico island tour here - Kayak and snorkel adventure – For something active but relaxing, explore Pico’s clear coastal waters by kayak, with time for snorkeling and swimming.
👉 Book your Pico kayak and snorkel tour - Go Wine tasting – Explore Pico’s UNESCO-protected vineyards and taste local wines from small, independent producers. Check my guide of Wine tasting in Pico island for the best experiences.
Whether you decide to relax with a glass of wine, swim in the Atlantic, or head back out for another adventure, you’ll quickly realize why so many travelers fall in love with Pico — even after the climb is over.
Frequently Asked Questions about Climbing Mount Pico
1. How long does it take to climb Mount Pico?
The Mount Pico hike usually takes between seven and eight hours in total — around three to four hours to reach the summit and another three to four to descend. The time depends on your pace, fitness level, and weather conditions.
2. How difficult is the Mount Pico hike?
Climbing Mount Pico is physically demanding. The trail is steep, rocky, and gains more than 1,100 meters in elevation. The final scramble to the top of Piquinho requires using your hands, but the hardest part is the descent, which can be tough on knees and ankles. If you’re reasonably fit and patient, it’s completely doable.
3. Do I need a guide to climb Mount Pico?
No, you don’t need a guide. The trail is clearly marked with 47 wooden poles from start to summit. However, joining a guided Mount Pico climb makes a big difference — guides help you pace yourself, show you the safest spots to step, and monitor changing weather conditions. They also handle registration and transport.
👉 Book your guided Mount Pico climb here
4. How much does it cost to climb Mount Pico?
If you climb independently, you only pay the 25€ registration fee at Casa da Montanha. Guided climbs
costs between 80€ (if it is a day or a night hike) and 200€ (for an overnight hike, which lasts almost 24h). The price includes registration, transport, hiking material and an experienced guide.
5. When is the best time of year to climb Mount Pico?
The best time to climb Mount Pico is in July and August. These are the only months when the weather is stable enough to guarantee good visibility and minimal rain. Climbing earlier or later in the year increases the risk of fog, wind, and rain, but I still think that June and September are great months for this adventure.
6. What happens if the weather turns bad during the climb?
If fog or rain arrives mid-climb, stop and reassess. If visibility drops so much that you can’t see the next trail marker, it’s safer to wait or turn back. The weather can change quickly, especially in the upper section. Always, ALWAYS check the weather forecast for that particular day. Otherwise you’ll go through a world of pain just to arrive at the top and see nothing at all!
7. What happens if I get injured on Mount Pico?
When you register at Casa da Montanha, you’ll receive a GPS tracker that lets the park authorities locate you if you need help. In case of injury or exhaustion, press the emergency button and stay where you are until assistance arrives. If you’re with a guide, they’ll handle all communication and coordinate with rescue teams.
8. Can beginners or children climb Mount Pico?
The Mount Pico hike is not recommended for young children or anyone without hiking experience. It’s steep, slippery, and physically demanding. Teens with good fitness and previous hiking experience can usually complete it with a guide, but this is not a casual family hike.
9. Can I climb Mount Pico in winter?
In winter, the mountain often has snow and ice, temperatures can drop below freezing, and strong winds are common. Most travelers climb Mount Pico between May and October, with July and August being the safest months. But some people do LOVE to climb Mount Pico with snow :)
Conclusion
Climbing Mount Pico is not an easy hike — but it’s one of the most rewarding things you can do in the Azores. Whether you go during the day or at night, reaching the top of Portugal’s highest mountain is an experience you’ll never forget.
If you want a safe, stress-free adventure with expert support, I recommend booking a guided Mount Pico climb. You’ll get local knowledge, safety, and peace of mind all in one go.
👉 Book your guided Mount Pico climb here
And if you’d like more practical advice for planning your trip to the Azores, sign up for my mailing list — that’s where I share my best insider tips, local secrets, and travel updates straight from the islands.
👉 Join my Azores mailing list
Safe climb, and enjoy every step — the view from the top is worth it.